Your first time with guinea keets? Here is some helpful information about their care.
When guinea fowl keets first hatch they are tired and will sleep a lot as most babies do. If you hatched the keets yourself, leave them in the incubator for at least 24 hours (up to 48 hours). They need to rest more than they need to eat and drink at this point.
Keets are unstable on their legs and may squat a lot but in 24 hours you should soon see a big difference with them running around as if they had weeks of experience.
Things You Need
Your first brooder can be as simple as a cardboard box or a large plastic tub or tote. You’ll need a heat lamp, small chick waterer, and bedding.
It’s important to provide your keets with a non-slippery surface. Do NOT use newspaper, cardboard, paper towels, or even chick paper; these are too slick for keets. Even more than chicks, keets need good traction underfoot in order to prevent splayed/spraddled legs.
Avoid using shavings for the first few days. A regular cotton towel, unscented puppy pads, rubberized shelf liners, Lucerne chaff are all good options.
Keets are dependent on their mothers to show them how to eat and drink, so you’ll need to step in if your keets are not with a mom. Drop the food for them – the movement will interest them. At first, just scatter food out on the bedding or on a paper plate or the like. You can transition to a paper egg-crate once they learn to eat. And you’ll need to dip each one’s beak in the water (be careful not to get the nostrils wet) once or twice. Use room-temperature water, and use a chick waterer so that the water stays tepid and so that they don’t fall asleep and drown as they could in a larger waterer.
You’ll need a hooded heat lamp or a brooder plate. Keets are not able to regulate their body temperature well. They need to be free of drafts and be able to move in and out of the heat as needed. If using a heat lamp, place it at one end of the brooder so they can get away from the heat. If using a brooder plate, you may want to consider some sort of night-light. Keets sometimes pile up, which can suffocate the bottom ones. A night light seems to help avoid that. Be sure the brooder plate is at exactly the right height. Too high, and the keets won’t be able to stay warm enough; too low and they might not get under it. A lot of people find a heat lamp easier to use and more successful at keeping their keets at the right temperature. However, some believe that heat lamps are too great a fire risk. I prefer heat lamps, and there are heat lamps designed specifically for use in coops and brooder spaces, and designed to reduce the possibility of causing a fire.
Keets are at a good temperature when they’re comfortably sprawled out around the heat source. If they’re really splayed out or panting, they’re too hot. If they’re huddled up together, they’re too cold. If they’re peeping sharply (not their normal happy-sounding peeps), they’re much too cold and they’re in trouble. As a rule of thumb, keets should be kept in a 95-degree F/35C environment for the first week.
Guineas are hard-wired to be afraid of things coming at them from above. Let them know you’re coming as you approach the brooder. Move slowly when putting your hand in, changing the bedding or the water, etc. Ideally, the brooder will have openings on one or more sides so that the keets can see out.
Watch for pasty bottoms or feet coated with feces (droppings). Pasty bottoms can prevent proper waste elimination and most often occurs with keets that are a few days old. Use a warm, wet cotton ball to gently clean the area. Be patient, and don’t pull dried matter away from the tender skin. Be prepared for a fecal ejection once the dried material is removed.
come off, risking an infection. This is a problem that is best avoided by changing the bedding often and making sure you have enough room for the number of keets and chicks.
What to feed keets is a somewhat controversial issue within the guinea-keeping community. Many online sources recommend feeding a high-protein starter, sometimes as high as 28%. However, there are several problems with this approach.

When inoculation isn’t an option, such as when buying keets locally, Amprolium in the feed or or Baycox in the water are the only solutions. In some regions, medicated turkey or gamebird starter is available, with a protein content of about 24%. It can be hard to find though, but you can feed medicated chick starter and supplement the protein with treats of dried mealworms and/or chopped up hardboiled eggs. (Add a source of grit when you start including treats.)
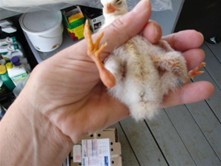
A keet’s wing feathers start to come in when they’re about 4 days old. Don’t be alarmed if you see keets looking as if they’re dragging their wings along the ground. They feather out differently than chicks do, and those long early wing feathers look ungainly.
Things You Need
By 10-14 days old, your keets will start being able to fly, so you’ll need a brooder with some type of top to prevent them from getting out. In addition, they need a lot more room to run and properly develop their leg muscles. Ideally they’ll have room to fly a little bit. Some things they can jump up onto and perch are helpful as well.
Get the biggest brooder or grow-out pen that you can manage. This can be a sectioned-off area of your coop if you can provide supplemental heat. Or a big box out on your porch or deck so that you can run an extension cord for a heat source. You could also make an outdoor “playpen” for them so that they can have some time in fresh air and sunshine, and access to grass. The more room you give your keets, and the more they’re exposed to fresh air and sunshine, the better they’ll smell (which means they’re cleaner and healthier) and the more fit they’ll be. In this regard, keets are very different from chicks. Keets are designed to range with their flocks right from Day One, so they want and need exercise.

You can supplement their diet with dried mealworms, chopped up greens, grass cuttings (either very long or finely chopped up to avoid an impacted crop). When giving them anything other than commercial feed, they’ll need access to grit. A sandbox, a bowl of gravel (not tainted with oil or the like), or purchased poultry grit will work. Giving them treats not only provides enrichment and “real food” for them; it also helps you to become the Food God or Goddess. This will become handy later when you want them to come to your call or return to the coop at night.
Guineas are scratchers by nature, and when they use a poultry feeder, there is a lot of waste. Many of us use a large plastic try to feed them – the lid from a 5-gallon bucket, a Tupperware-type lid, or a dedicated poultry tray such as this one from Premier 1 Supplies:

By the time they’re a week old, you can transition to bedding that will be easier to keep clean. Large-flake pine shavings (sold at any feed or pet store) are probably the most popular. Be sure not to use cedar (it can be toxic) or small flake (they may eat it). Some people really like hemp bedding. Here again, watch to be sure the keets aren’t eating it to the exclusion of their food. Sand, dirt, pine straw are all suitable as well.
Continue to give them medicated feed or Corid/Baycox in their water. Reduce their brooder temperature:
These temperatures are guidelines. Watch your keets’ behavior for clues that they’re comfortable. Keets generally need less heat during the day, more at night.
Your keets go through four different feathering stages. Don’t be fooled by the first set or two of juvenile feathers and think that yours are fully feathered. They still need supplemental heat, especially at night, unless you’re in a very warm climate.
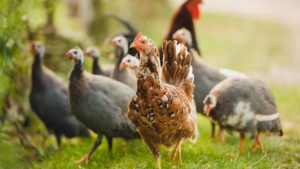
At this point, keets in nature would be integrating into the existing flock, as the mom would start to bring them to wherever the flock is roosting. This is the ideal time for introducing your keets to your existing flock, if you have one – whether other guineas, chickens, or other poultry.
The easiest method is to move your keets to a space where they can see and interact with the flock. A sectioned-off corner of the coop, or a large dog crate within the coop, for example. After they’ve settled in, when the coop is empty, close the coop door and let the keets out in the afternoon. Let them explore the coop and get their confidence up. After awhile, usher them back into their space (using herding-sticks will make it easier). Repeat with longer release times for about a week. Then you can begin opening the coop door so your flock can interact with them, and they can start exploring the outdoors. Expect some pecking-order issues – pecking and charging – but you shouldn’t see any real violence. Break it up with your herding sticks if you do. Provide some hay bales or propped-up boards so that the keets have hiding places if they need it.

You can now start training them to return to the coop at night. See the article on Training Keets to Return to the Coop under our Articles tab.
After six weeks, you can transition them away from coccidiosis preventative, as they will have started building their own immunity by now. They can eat a flock grower or layer (depending on the season). Pellets generally are less wasteful than crumbles. As they get a little older, wean them off of having access to food 24/7. In nature, guineas eat about four times a day. Many of us feed in the morning and late afternoon. This helps motivate them to continue returning to the coop for roosting.
Good luck and congratulations on your new flock!